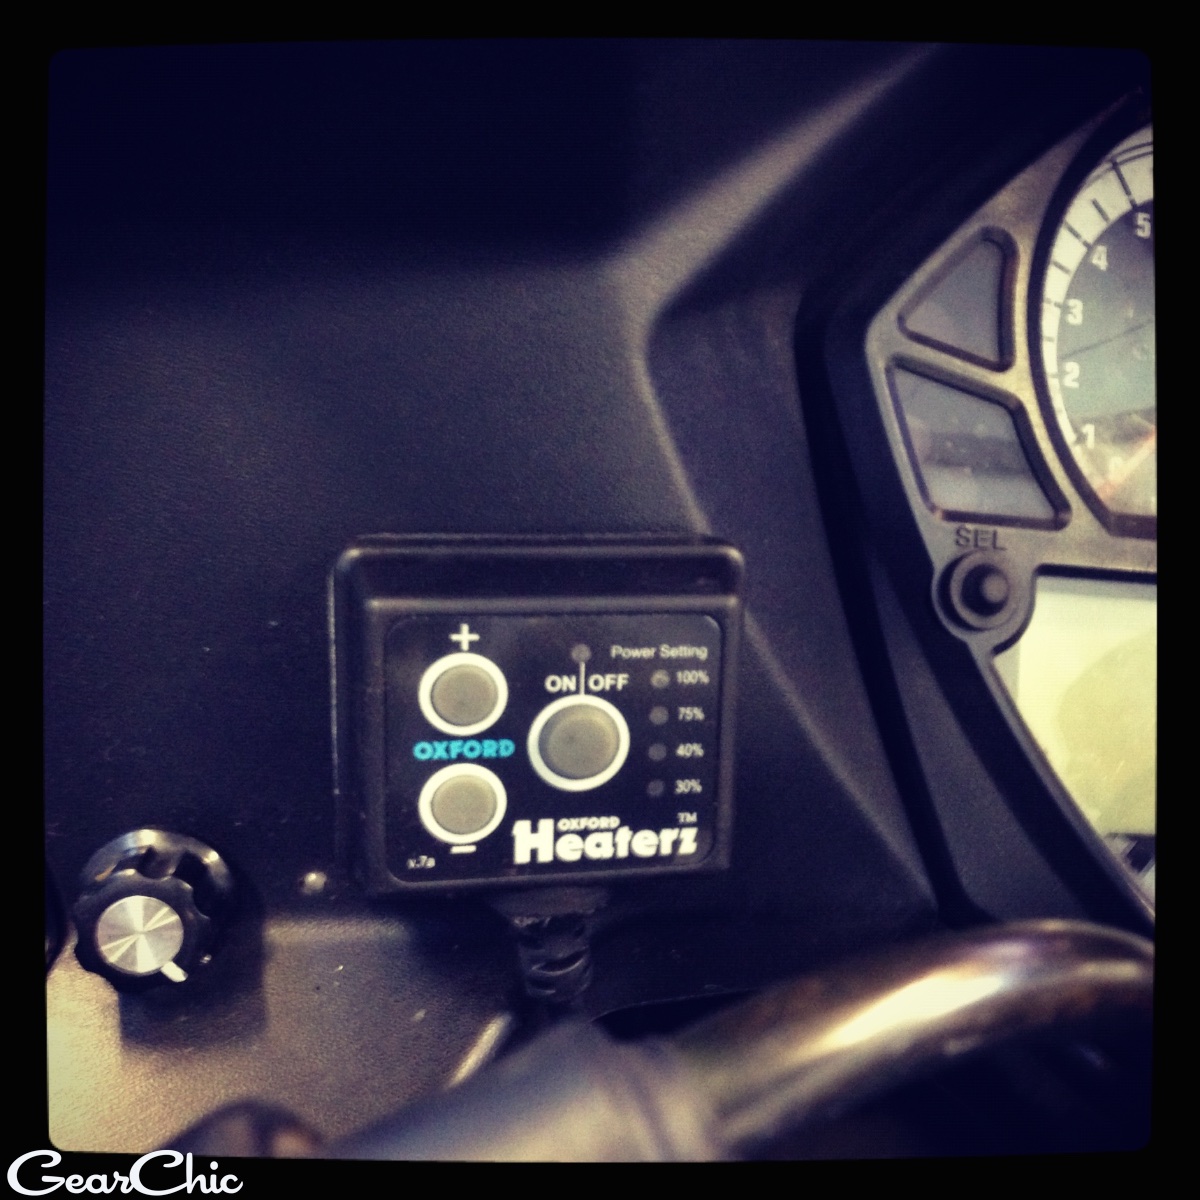
Oxford Heaterz Premium Touring Grips
- $89.95 MSRP
- 5 heating levels
- 4.5" grip circumference
- 4.72" grip length
- Automatic shutoff feature
- Waterproof controller
- Available at Revzilla.com
- Sample purchased by Me for review
Installation
These are my second pair of Oxford Heaterz. I installed my last set on my '03 SV650S which stayed on the bike when I sold it. I opted for the slightly newer version to take advantage of a couple new features:
- auto shutoff
- different grip feel/texture
I mistakenly bought the "sport" grips before and I definitely regret that decision. The feel wasn't smooth or grippy, just really uncomfortable. I really like these new models. I never felt any discomfort and simply love the way they work and all the heat they generate. It feels as if they get much hotter than my last set. In addition to the grip feel, they've taken away the power button and added another heating level; much simpler and easier to use.
Since my bike has no front fairing or flat mounting surface I had to mount it a little differently. But it didn't make a huge difference and it's still a clean, simple setup. It took me a couple hours to finish, but mainly because I had some issues at the end which had more to do with my bar end mirrors, not the grips themselves.
First I'll show you the steps I went through for installation. Then I'll provide a brief ride review at the end.
Step 1:
Remove bar end mirrors and begin removing the stock handle grips. This was fairly easy. Just needed a flathead screwdriver and some Windex.

Note:
When I removed the bar end from the throttle side, the nut inside on the screw fell into the handlebar. For some reason it wasn't wound very tight around the bar end screw. Unfortunately I didn't realize this until the very end of the process when I went to put my bar end mirrors back on. So I took a wire hanger, stretched it out and then poked the hanger through the handlebar until the nut came out. Whew! For some reason the left side handlebar didn't have any issues.
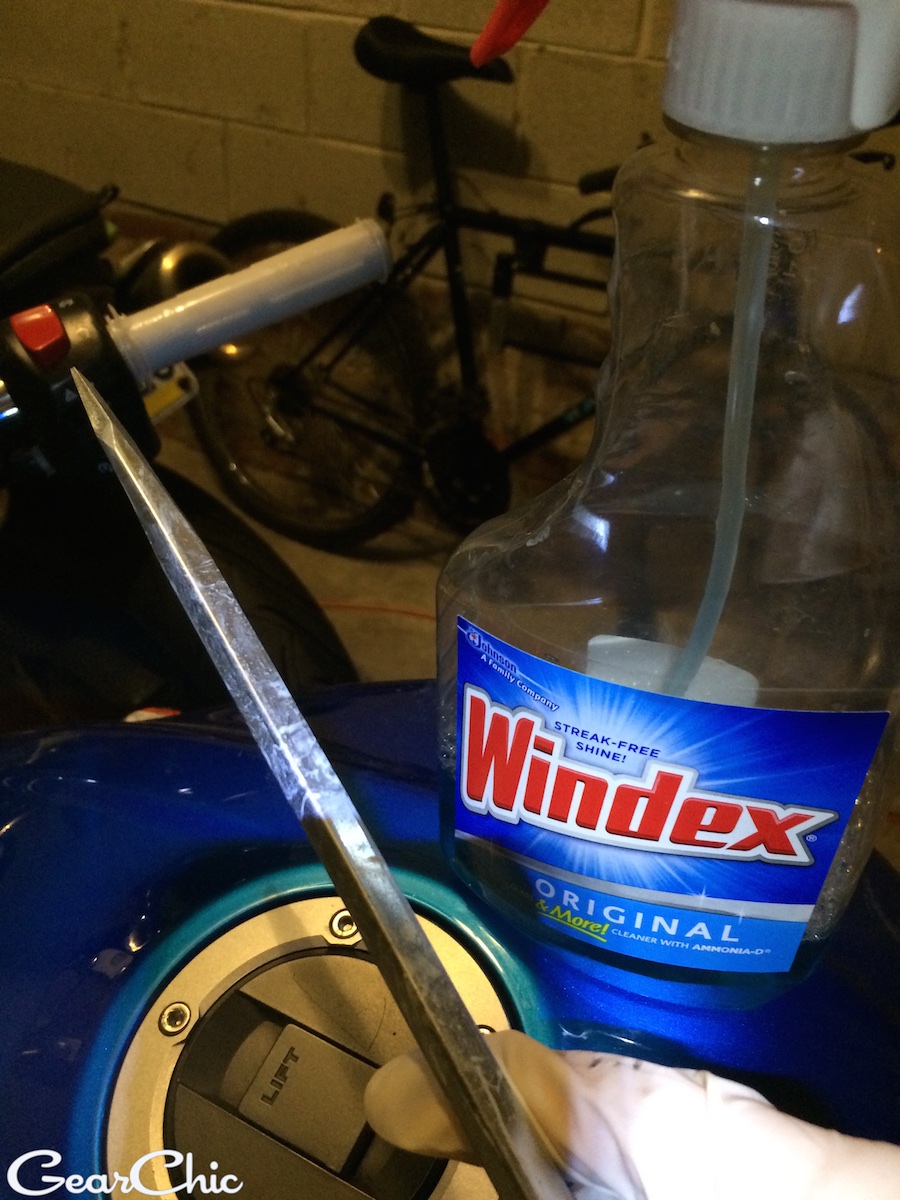
The throttle side was easy. I just had to spend a little extra time cleaning the leftover bits of glue off the clutch side. After 5-10 minutes of wiggling the flathead underneath the edge of the grip and spraying Windex in there, they came right off.
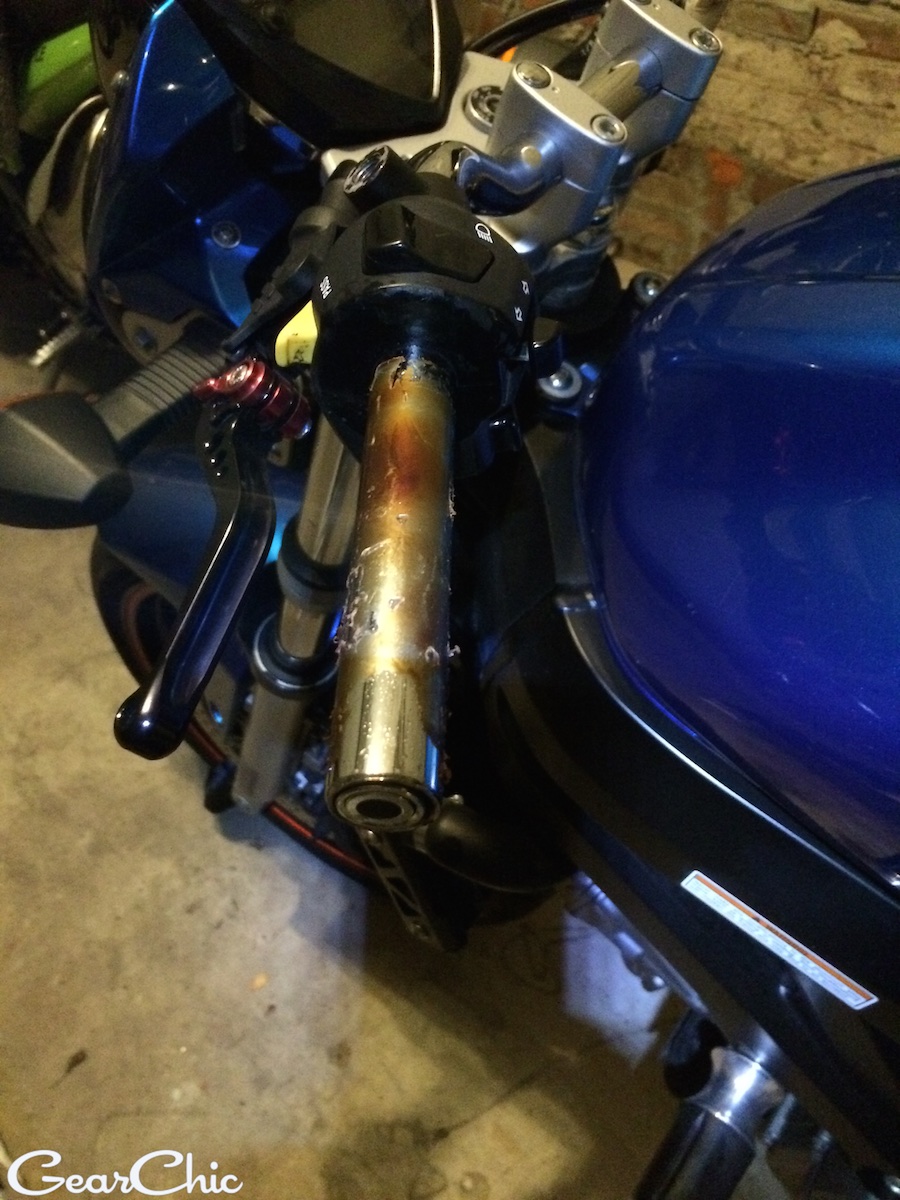
If I were smart, I would've had sandpaper ready to go but instead I had a microfiber cloth and some WD40. 15 minutes later and voila! You should clean all the glue off so the new handgrip slides on easy without any issues.

Step 2:
I used the lower bolt from the clutch lever mount and then adhered it using the double sided stick mount that came with the grips. I tried to use the screws, but the holes were simply too small so I never got them to screw down all the way. If the stick mount doesn't hold, I'll figure out something else, but after 15 minutes or so I gave up trying to use the screws. It feels pretty solid. I don't think it matters when you mount this part, since nothing's plugged in. I just decided to.

Step 3:
Mounting the handgrips. Each one is marked L and R, make sure you use the right ones. Here's where the throttle hand decided to throw me a curve ball. I forgot to take a picture before this one but below you can see where the remnants of a plastic lip existed before I shaved it off. I definitely couldn't get the grip over the edge so I figured it wouldn't be missed anyhow. Off it went.
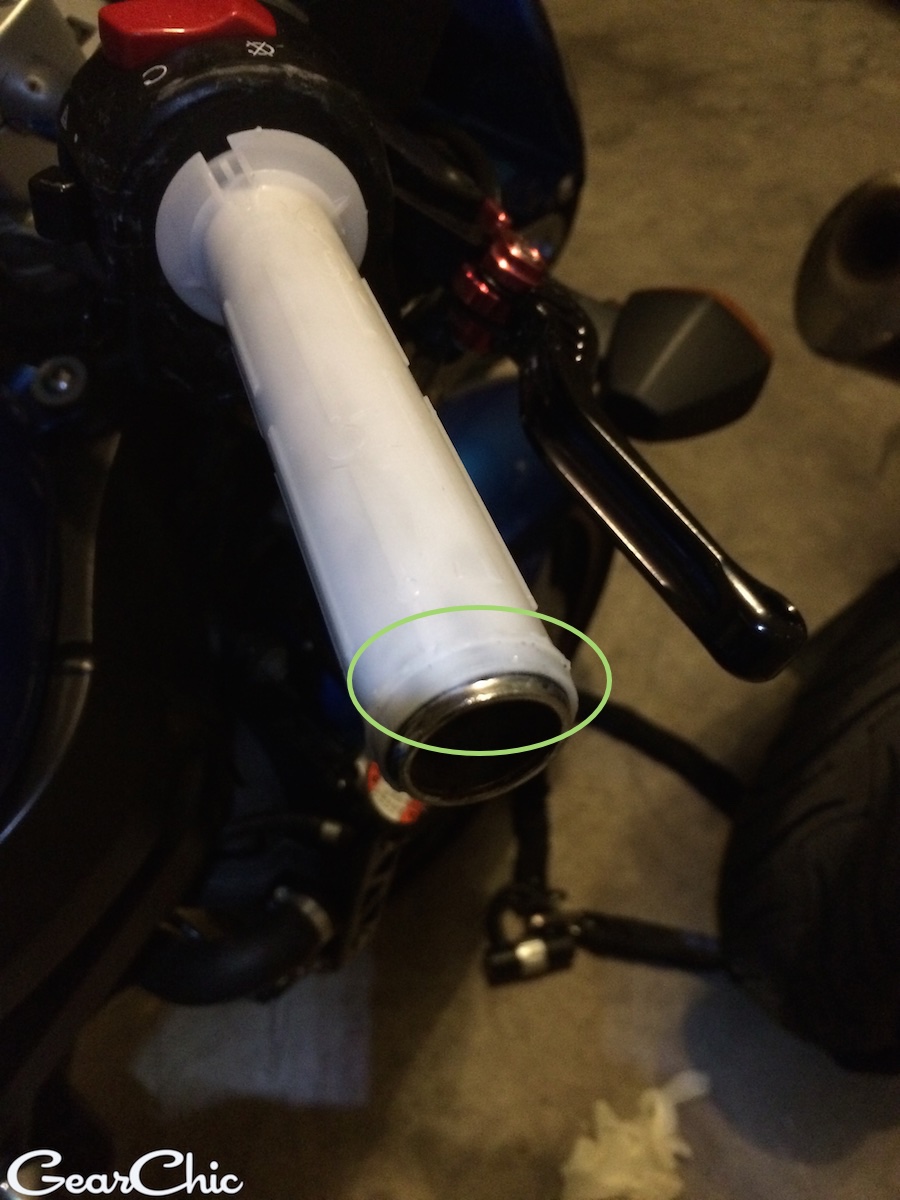
Use the superglue per the directions, and then slide them on. Just make sure you slide them on fairly quickly. The glue dries quickly so as soon as as you squeeze it onto the handgrip, start placing them. Voila! It's hard to see but there's a little arrow that points downward so you know whether or not you have the handgrip positioned correctly. Make sure the arrow points perfectly south, 90 degrees to the ground.

Step 4:
Plug the right and left handgrips into the two shorter connections that come out from the controller (per the diagram in the instructions). Start running your wires neatly underneath and behind your triple clamp or wherever you can hide them without running into the steering column. Make sure you can fully turn your bars to the left and right without any trouble.

Step 5:
Attach the battery harness plug to the longer plug on the controller. Then run the line all the way to your battery. What I did was unscrew my gas tank so I could run the line completely underneath. Then I snaked it along the engine and pulled it up through to the battery so everything was hidden.
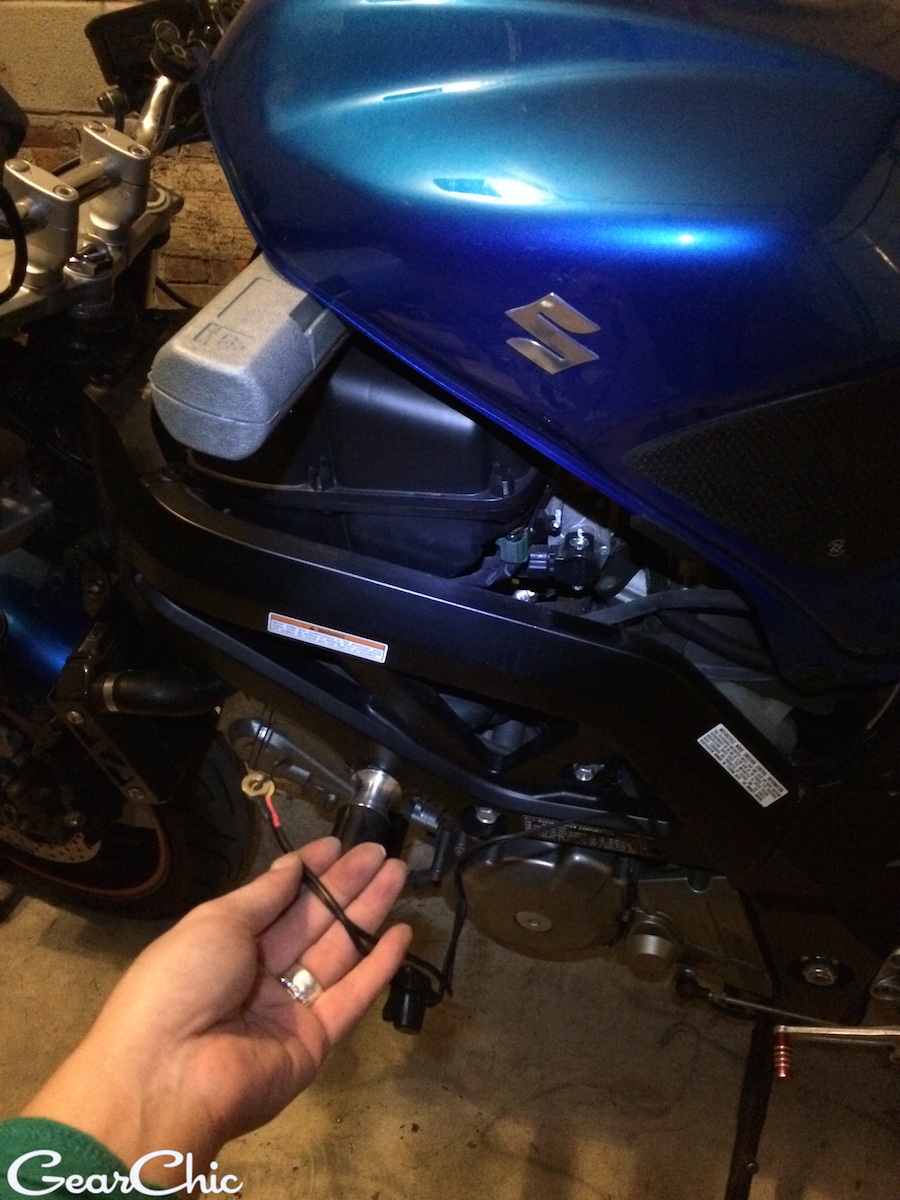
Quick Tip: I used one of the twist ties to keep the battery harness together while I snaked it behind the subframe.

After putting the seat back together and using a few zipties to clean up the cables, all done!

Review
After riding 200 miles on a chilly winter day last week, I'm thrilled to report how well the newest version of Oxford Heaterz performed!
I feel like they're warmer than the last set, and the heat is more intense on the lower levels. I never once had to turn it past 50%, even at the coldest temps in the morning. My gloves aren't winter worthy either, they're fairly lightweight and don't insulate very heavily. As a result my fingertips were a little cold, but I blame myself since I'm using them well beyond their limits.
I love the extra level of heat and the easy way of powering the grips on and off. Just press and hold the Plus (on) or Minus (off) button, and after a second or two the grips respond. The controls are easy to operate while riding as well. I can't complain about having heat when my hands would freeze otherwise. I basically kept them on at 30% or 40% the entire time while riding, which kept my hands fairly warm. I turned them up briefly to 50% when we jumped on the highway, where the windchill was definitely getting to me.
The grips felt far more comfortable than the Sport version, smoother and less prickly. You don't have to buy the matching grips for your Sportbike, these simply feel better and offer plenty of grip and more comfort.
The only issue I had, which I completely forgot about is the fact that the throttle side grip doesn't sit flush up against the handgrip. It just took me a few minutes to get used to it again, because I don't recall this bothering me on my last SV. One thing I definitely had to do was push my brake and clutch levers out to the furthest point so they wouldn't touch the protruding cable from the grip. I think that when I installed these the last time I must not have followed the arrow on the handgrip and angled them further down. Luckily I have fully adjustable short levers so it was easy. I highly recommend not gluing the grips until you've placed them on the tube and found the position that works best for your levers and riding position.

Overall, I highly recommend the Oxfordz for every motorcycle. Having 5 levels of intense heat is awesome. Installation is straightforward and easy to do on your own. Cheaper grips typically have 1, maybe 2 levels of heat, it's worth the extra money in my opinion, to get the additional levels of heat for a more comfortable ride.